

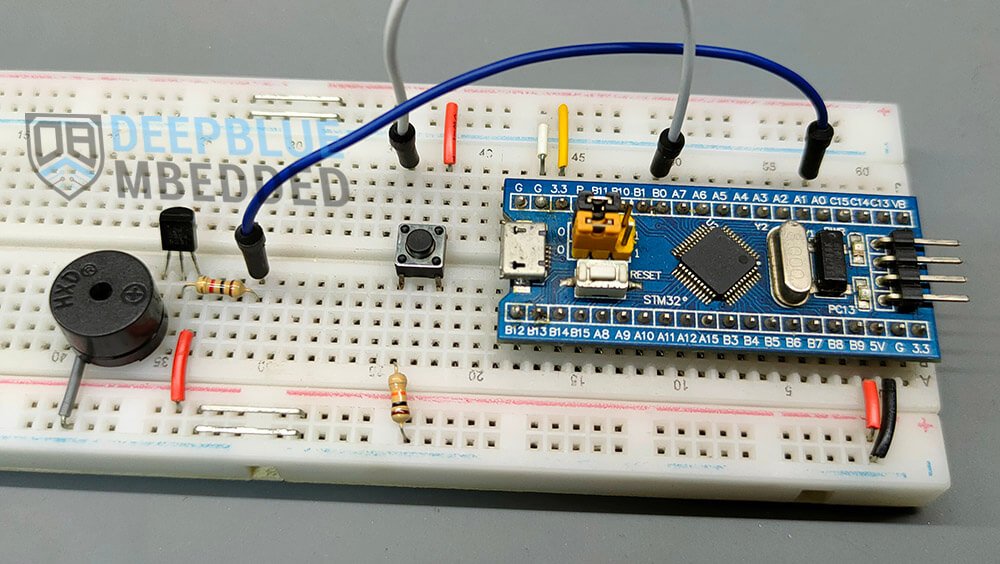
Operating a Resistor with a Piezo Tweeter,Whether you’re building a DIY speaker system or troubleshooting a buzzy, harsh-sounding tweeter, this guide covers everything you need to know about running a resistor on a piezo tweeter and why skipping this step could cost you more than just bad audio.
What Exactly Is a Piezo Tweeter? (And Why Should You Care)
Piezo tweeters are fascinating little devices. Small, cheap, and surprisingly loud they show up everywhere from car audio systems to intercoms to DIY speaker builds.However, do not underestimate them because of their modest dimensions. These components carry some serious quirks that every audio enthusiast needs to understand before wiring them up.
At their core, piezo tweeters work on the piezoelectric effect. When you apply an electrical signal to a piezoelectric crystal or ceramic disc, it physically vibrates. Those vibrations produce sound. Think of it like pressing your finger on a drumhead the pressure creates movement and movement creates noise. It’s elegant, simple physics doing all the heavy lifting.
How Piezo Tweeters Work — The Basic Science
Here’s what makes piezo tweeters different from traditional dynamic tweeters. A dynamic tweeter uses a voice coil and magnet to move a diaphragm. A piezo tweeter skips all that. It uses a ceramic element that bends and flexes in response to voltage changes. No coil. No magnet. Just a crystal doing its thing.
This design gives piezo tweeters some real advantages:
- No crossover required (technically) — they naturally roll off low frequencies
- Extremely efficient — they don’t draw much current
- Durable and affordable — few moving parts means fewer failure points
- Easy to install — they’re practically plug-and-play
Why Piezo Tweeters Are So Popular in DIY Audio Builds
Walk into any electronics hobby community and you’ll find piezo tweeters everywhere. They’re the go-to choice for beginners because they’re forgiving, inexpensive, and widely available. Building a small PA system? Piezo tweeter. Adding high-frequency sparkle to a bookshelf speaker? Piezo tweeter. Weekend garage audio project? You guessed it.
But here’s the catch — and this is the part most beginners discover the hard way.
The One Big Problem Most People Don’t Talk About
Piezo tweeters have a wildly unpredictable impedance curve. Unlike a standard 8Ω speaker that stays relatively consistent across frequencies, a piezo tweeter’s impedance drops dramatically as frequency rises. At high frequencies, it can fall to just 1Ω or even lower. That’s where the trouble starts.
Your amplifier sees that low impedance and essentially tries to drive a near-short circuit. It works harder. It runs hotter. And over time, it can fail. Running a resistor on a piezo tweeter is the solution — and it’s simpler than you might think.
The Real Reason You Need a Resistor for Your Piezo Tweeter
Let’s be direct about this. The number one reason people add a piezo tweeter resistor is to protect the amplifier. Not because it always improves sound (though it often does). Not because some audio rulebook says so. Because without one, you’re potentially gambling with your amp’s lifespan every time you crank the volume.
Understanding Impedance — What It Is and Why It Matters Here
Impedance is essentially resistance in an AC circuit. It’s measured in ohms (Ω) and it tells your amplifier how hard it needs to work to push current through a speaker. Most amplifiers are designed to handle loads of 4Ω to 16Ω comfortably.
Here’s a simple way to think about it. Imagine your amplifier is a water pump and the speaker is a pipe. A standard 8Ω speaker is a normal-sized pipe — the pump works steadily and everything flows fine. A piezo tweeter at high frequencies is like trying to pump water through a garden hose with no resistance — the pump strains,Operating a Resistor with a Piezo Tweeter, overheats, and eventually breaks.
Why Amplifiers Hate Low-Impedance Loads
Most solid-state amplifiers can handle brief dips in impedance. But sustained low-impedance loads especially at high frequencies where piezo tweeters love to live — put real thermal stress on output transistors. The amp draws more current, generates more heat and without proper cooling or protection circuitry, things go wrong fast.
Key risks of running a piezo tweeter without a resistor:
- Amplifier output transistors overheating
- Oscillation and instability in the amp’s output stage
- Audible distortion at high volumes
- Premature failure of the amplifier
- In worst cases, complete amp burnout
What Actually Happens When You Skip the Resistor
Picture this. You’ve just built a sweet little PA system for your garage band. You wire up a pair of piezo tweeters directly to your amp with no resistors. Everything sounds fine at low volumes. Then someone turns it up. Suddenly the highs get harsh and brittle. The amp starts running hot. A week later, the amp cuts out mid-song. Sound familiar? Operating a Resistor with a Piezo Tweeter,That’s the piezo impedance problem in action.
“I fried two amplifiers before someone told me about series resistors on piezo tweeters. It seems obvious in hindsight but nobody mentions it in the basic tutorials.” — Common sentiment in DIY audio forums
Running a Resistor on a Piezo Tweeter — How It Actually Works
Now for the good part. Understanding how a piezo tweeter protection resistor actually functions isn’t complicated.You are not required to have a degree in electrical engineering.. You just need to understand the basic concept of series resistance.
Series Resistor vs. Parallel Resistor — What’s the Difference?
There are two ways to connect a resistor in a circuit — in series or in parallel.
| Connection Type | How It Works | Effect on Piezo Tweeter |
| Series | Resistor placed in line with the tweeter | Limits current, raises minimum impedance seen by amp |
| Parallel | Resistor placed across the tweeter terminals | Provides a constant load path for the amplifier |
For piezo tweeters, series wiring is the most common and recommended approach. It’s simpler, safer and it does exactly what you need — it puts a floor under the impedance curve so the amp never sees a dangerously low load.
How a Series Resistor Tames the Piezo’s Wild Impedance Curve
When you place a resistor in series between the amplifier and the piezo tweeter, you’re adding a fixed resistance to the signal path. Even if the tweeter’s own impedance crashes down to 1Ω at 20kHz, the amplifier still sees the resistor’s value plus that 1Ω. Operating a Resistor with a Piezo Tweeter.If you’re using an 8Ω resistor, the amp sees roughly 9Ω a perfectly comfortable load.
It’s a beautifully simple solution. One component. No complex circuitry. Problem solved.
Does Adding a Resistor Affect Sound Quality?
Honestly? Yes but usually for the better. Without a resistor, piezo tweeters can sound harsh, brittle and fatiguing. That’s partly because of the uncontrolled high-frequency response and partly because the amplifier is stressed and not performing optimally. A properly chosen resistor smooths things out. It slightly rolls off the very highest frequencies and gives the tweeter a more controlled, musical character.
The tradeoff is a small reduction in overall volume from the tweeter. But most setups find that this actually helps with tonal balance — piezo tweeters tend to be too bright without some attenuation.
What Resistor Value Should You Use for a Piezo Tweeter?
Operating a Resistor with a Piezo Tweeter,This is the question everyone asks first. And the honest answer is — it depends on your setup. But there are solid guidelines to follow.
The Most Commonly Recommended Values
The most popular choices in the DIY audio world are 4Ω, 8Ω and 10Ω resistors. Each serves a slightly different purpose depending on your amplifier’s output impedance and how much attenuation you want.
| Amplifier Output Impedance | Recommended Resistor Value | Minimum Wattage Rating | Effect on Tweeter |
| 4Ω | 4Ω – 6Ω | 5W | Mild attenuation, good protection |
| 8Ω | 8Ω – 10Ω | 5W – 10W | Moderate attenuation, excellent protection |
| High impedance (16Ω+) | 10Ω – 15Ω | 10W | Strong attenuation, maximum protection |
| Car audio (typically 4Ω) | 4Ω – 8Ω | 10W minimum | Accounts for higher power levels |
How to Calculate the Right Resistor
You don’t need complex math here. A practical rule of thumb — match the resistor value to your amplifier’s rated output impedance. If you’re running an 8Ω system, start with an 8Ω resistor. If the tweeter still sounds too bright, bump up to 10Ω and it sounds too rolled off and dull, try 6Ω. Trust your ears alongside the numbers.
For car audio applications, lean toward higher wattage ratings at least 10W because car amplifiers often push more power than home audio units.
Wattage Ratings — Don’t Overlook This Part
Here’s a mistake that catches a lot of people off guard. They buy the right ohm value but completely underestimate the wattage rating. A resistor rated at 1W will overheat and potentially fail if your amp is pushing 20W through it. Overheating resistors smell terrible and can damage surrounding components.Operating a Resistor with a Piezo Tweeter.
Safe wattage selection guidelines:
- Calculate the maximum power your amp sends to the tweeter channel
- Choose a resistor rated at double that wattage minimum
- When in doubt, go bigger — a 20W resistor in a 10W application runs cool and lasts forever
- Use wirewound resistors rather than carbon film for higher power applications — they handle heat far better
How to Wire a Resistor to a Piezo Tweeter — Step by Step
Let’s get practical. Wiring a resistor to a piezo tweeter is genuinely beginner-friendly. If you can solder two wires together, you can do this.
Tools and Components You’ll Need
- Piezo tweeter (obviously)
- Resistor (correct ohm value and wattage — see table above)
- Soldering iron and solder
- Heat shrink tubing or electrical tape
- Wire strippers
- Multimeter (helpful but not essential)
Series Wiring Walkthrough — The Most Common Method
1: Identify the positive terminal on your piezo tweeter. Most have a red wire or a “+” marking.
2: Cut the positive wire coming from your amplifier. You’ll insert the resistor into this break.
3: Solder one leg of the resistor to the wire coming from the amplifier’s positive output.
4: Solder the other leg of the resistor to the positive terminal of the piezo tweeter.
5: Connect the negative wire from the amp directly to the negative terminal of the tweeter — no resistor needed on the negative side.
6: Cover all solder joints with heat shrink tubing. Apply heat to shrink it snug.
7: Test at low volume first. Gradually increase. Listen for any harshness or distortion.
That’s genuinely it. The whole process takes about 15 minutes.
Common Wiring Mistakes to Avoid
- Putting the resistor on the negative wire — always use the positive line
- Using a resistor that’s too small in wattage — it’ll overheat under load
- Cold solder joints — they increase resistance unpredictably and cause noise
- Skipping heat shrink — bare connections in a car or humid environment corrode fast
- Forgetting to test at low volume first — always start quiet
Does Running a Resistor on a Piezo Tweeter Affect the Crossover?
Great question and one that experienced builders often wrestle with. The short answer is yes, there’s an interaction. But it’s manageable.
How a Resistor Interacts With Your Existing Crossover Network
If you’re already running a crossover (either passive or active) before your piezo tweeter, adding a series resistor changes the total impedance the crossover “sees.” This can slightly shift the crossover frequency. In most practical applications especially with simple first-order crossovers the shift is minimal and doesn’t meaningfully affect performance.
However, if you’re running a precision crossover designed for a specific impedance load, you’ll want to account for the resistor’s value in your calculations.
Should You Use a Resistor or a Proper Crossover — Or Both?
Here’s the honest take:
- Resistor only — Fine for simple builds, protection-focused setups and beginners
- Crossover only — Better frequency control but doesn’t fully address impedance protection
- Resistor + crossover — The gold standard for serious builds
Many experienced DIY audio builders use a simple RC crossover (resistor + capacitor combination) which simultaneously acts as a high-pass filter and provides impedance protection. It’s two birds, one stone.
| Approach | Pros | Cons |
| Resistor only | Simple, cheap, effective protection | No frequency shaping |
| Crossover only | Good frequency control | May not fully protect amp |
| Resistor + crossover | Best of both worlds | Slightly more complex wiring |
| RC crossover | Elegant, space-saving, dual purpose | Requires calculating capacitor value |
Piezo Tweeter Resistor Mistakes That Kill Your Sound (And Your Amp)
Everyone makes mistakes. Here are the most common ones learn from other people’s expensive lessons.
The Most Damaging Mistakes in Practice
Using the wrong wattage resistor — This one causes actual component failure. A 1W resistor connected to a 30W amplifier will literally burn out. Smell the smoke? That’s your mistake telling you it’s done.
Skipping the resistor entirely — “It sounds fine at low volumes” is the classic line right before someone ruins an amplifier. Piezo tweeters don’t announce their impedance problems — they just quietly stress your amp until something gives.
Mismatching impedance — Running a 4Ω resistor on a 16Ω system creates a mismatch that the amplifier doesn’t like. Always match your resistor to your system’s impedance rating.
Poor soldering — Cold solder joints create intermittent resistance.You will perceive it as pops, static noise, or interruptions. Worse, they can arc and cause heat buildup at the joint.
Using the wrong resistor type — Carbon film resistors are fine for low-power applications but they don’t handle heat well. For anything above 5W, use wirewound resistors. They’re built for sustained thermal loads.
Real-World Results — What Difference Does a Resistor Actually Make?
Theory is great. Real-world results are better. Here’s what actually happens when you add a piezo tweeter protection resistor to a working system.
Case Study 1: The DIY Home Theater Build
A hobbyist builder added four piezo tweeters to a home theater surround system without resistors. Within three months, one of the surround amplifier channels began distorting at moderate volumes. After adding 8Ω/10W wirewound resistors in series with each tweeter, the distortion disappeared and the sound became noticeably smoother in the upper frequencies. The builder reported the system had been running cleanly for over a year since the fix.
Case Study 2: The Car Audio Upgrade
A car audio enthusiast added piezo tweeters to a four-channel amplifier setup. Without resistors, the amp’s protection circuit kept triggering at high volumes a classic sign of impedance-related stress. Adding 4Ω/10W resistors resolved the issue immediately. Bonus result the harsh, sibilant high frequencies that had been fatiguing on long drives mellowed into a far more pleasant listening experience.
Sound Quality — Before and After
| Characteristic | Without Resistor | With Resistor |
| High frequency harshness | Prominent, often fatiguing | Smoothed, more natural |
| Amplifier stability | Prone to thermal stress | Stable across volume levels |
| Tweeter volume level | Often too loud, unbalanced | Better matched to woofers |
| Listening fatigue | High on long sessions | Significantly reduced |
| Amp protection circuit trips | Common at high volumes | Rare or nonexistent |
Frequently Asked Questions About Piezo Tweeter Resistors
Do All Piezo Tweeters Need a Resistor?
Technically, no but practically, yes. Some modern piezo tweeters include internal impedance compensation. But the vast majority don’t. Unless your tweeter’s datasheet specifically says it’s amplifier-safe without a resistor, add one. The cost is minimal and the protection is real.
Is it Possible to Substitute a Resistor for a Crossover?
You can and many people do. A series resistor won’t shape the frequency response the way a proper crossover does but it provides basic protection and some passive attenuation. For casual builds, it’s perfectly adequate. For audiophile-level builds, pair it with at least a simple capacitor to form a basic high-pass filter.
Will a Resistor Damage My Piezo Tweeter?
No. A correctly sized resistor protects the tweeter and the amplifier. It doesn’t harm the tweeter in any way.
What’s the Best Resistor for a Piezo Tweeter in Car Audio?
For car audio, use a 4Ω to 8Ω wirewound resistor rated at 10W minimum. Car amplifiers push more power than typical home audio amps so the higher wattage rating is essential.
Can I Run Two Piezo Tweeters on One Resistor?
Yes — if they’re wired in series and the resistor’s wattage rating is sufficient for the combined load. For parallel wiring of two tweeters, each tweeter should ideally have its own resistor to ensure balanced performance.
Final Thoughts — Don’t Skip the Resistor
Running a resistor on a piezo tweeter is one of those small steps that makes a big difference. It’s cheap. It’s simple. It takes 15 minutes. And it protects equipment that costs far more than a handful of wirewound resistors ever will.
The piezo tweeter is a brilliant little component versatile, efficient and surprisingly capable when used correctly. But “correctly” means understanding its quirks. That wild impedance curve isn’t a flaw you just live with. It’s a known characteristic with a known fix.Operating a Resistor with a Piezo Tweeter.
Quick summary of what you should take note of:
- Always run a series resistor between your amp and your piezo tweeter
- Match the resistor’s ohm value to your system’s impedance
- Always choose a wattage rating at least double your expected power
- Use wirewound resistors for anything above 5W
- Consider an RC crossover for a dual-purpose solution
- Test at low volume before cranking it up
Your amplifier will thank you. Your ears definitely will.